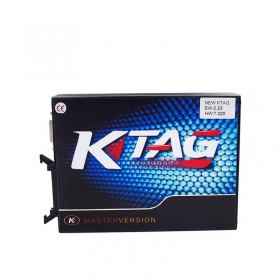
Free download Ktag/ Kess V2 software Ksuite v1.93, which can solve: – error “Tool is not updated” – ktag/kess not working with gray buttons Part 1: Kess v2 Ktag v1.93 download on Mega https://mega.nz/#!f8xQGLRA!8ZNod0YLAI-bY0rezjpthlBxyg-lzMSWnZCBoreCUuY Working ok with: SE87-D: V2.28 KESS V2 Firmware V4.036 SE80-B: KTAG Firmware V6.070 KSuite V2.1.3 SE80-D: V2.13 KTAG KTM100 FW V7.003 Suitable for the ktag/kess v2 QC mark ends with numbers“015” Not suitable for other kess or ktag programmers. If you try on other version, eobdtool.co.uk hold no responsibility for your try. Part 2: How to solve Kess v2 error “Tool is not updated” Here is the error message when running ktag. kess v2ACHTUNG: Tool ist nicht aktualisiert. PC mit Internet verbinden und Software erneut ausfuhren (kess v2 CAUTION: Tool is not updated. Connect PC to the Internet and run software again) Here you go…. Change another laptop / use another USB cable for reflash by J-Link,disconnect internet connection, re-install ksuite software and driver. Run again the Ksuite software. If it doesn’t work, download ksuite v1.93 above. It will work as usual. Part 3: How to solve Ksuite not working with gray buttons Ktag/kess v2 not working with gray buttons after…
What’s the difference KTAG V7.020 vs. KTAG 7.003 vs. KTAG 6.070? Which ECU types are newly supported? Check below KTAG V7.020 Ksuite V2.23 screenshots! In general, KTAG 7.020 add more than 100 ECU protocols newly supported. Here you are going to download the KTAG K-suite 2.23 car& ECU list: http://www.autocardiag.com/ktag-ktag-7020-full-european-version-support-online-no-token-limited-p-698.html Some screenshots of KTAG FW 7.020 Ksuite V2.23 new ECU protocols: BDM 68K (CAT ADEM III, etc) BDM HC12 (Continental Siemens VDO, etc) BDM HC16 (DENSO 21175, etc) BDM MPC5XX (BOSCH EDC16/16+, BOSCH EDC7, BOSCH ME9/9+, etc ) BOOTLOADER M32R (DENSO 21175, etc) And KTAG Firmware 7.020 PCB Board for checking: ================================== 24hour Online Customer Service: E-mail:autocardiag@gmail.com Skype:Marshall.obd2 Whatsapp:86-13476108995 http://www.autocardiag.com ==================================
JLR Pro for Jaguar and Land Rover JLR PRO Introduction: Model name:JLR pro Software Version:V145 Update:By link Car Models:for Jaguar and Land Rover Languages:Multi-languages Functions:Diagnostic interface Connection:By OBD2. Computer requirements:Better is XP JLR Mangoose SDD V143 is verified working well and available at WWW.AUTOCARDIAG.COM SDD V143 compatible hardware: JLR Mangoose (SP116) JLR Mangoose Pro (SP205) VXDIAG VCX NANO for Land Rover and Jaguar (SP240) DA-VINA 2534 J2534 Pass-Thru Interface (SP202) VCM 2 (SP177-G, SP177-FB, SP177-E) SDD V143 software free download: SDD V143 comes with 3 DVD’s, the CD’s is 99% Executables (.EXE) and a Frozen software to get license key. If you get the CD broken, don’t worry, just browse http://diagnosticdelivery.jlrext.com/idscentral Download only these files: SDD 143.00_FULL.exe VDF_JA_143.exe VDF_JV_143.exe VDF_LA_143.exe VDF_LV_143.exe SDD_143.01.exe SDD_143.02.exe SPA_143.exe (Note: With these files you can’t install yet, you need additional “Driver for MangoosePro_JLR” and license key.) JLR Mangoose Pro SDD V143 Setup Instruction: OS requirement: Xp system or XP Mode in Windows 7 (Step-by-step instruction: http://windows.microsoft.com/en-us/windows7/install-and-use-windows-xp-mode-in-windows-7 ), or vmware XP in windows 7 Installation Tips: Tip 1: Disable both local area connection and wireless connection network, otherwise antivirus software will say virus possibility on the license key software. Tip 2: Firstly install software then driver then freeze software, finally to test diagnostic function. About freeze software and how to do if the software expire? JLR SDD V143 is offline trial version, the software will expire within one day. The freeze software has to be installed within one day to freezethe software and can be used all the time. If you didn’t install the freeze software within one day, you will get prompt saying the software has expired, the solution is to reboot the computer, enter the computer BIOS settings, reset the computer date/time to the day before the trial period. Take Dell D630 laptop for example, press “Power” button then F2 button, then enter BIOS – Date/Time, reset the date/time to 2015-12-7 7:36:12 PM. Overview: Part 1 Install SDD Part 2 Install VDF_JA Part 3 Install VDF_JV Part 4 Install Additional Pinpoint Tests Part 5 Install SDD 143.01.001 Part 6 Install VDF_LA Part 7 Install VDF_LV Part 8 Install J2534 MongoosePro JLR Setup Part 9 Install software for MongoosePro JLR J2534 Interface Part 10 Run JLR SDD Part I1 Install Deep Freeze Step –by – step procedure Part 1 Install SDD Open My Computer>>143-1(F:), to copy “Driver” “DF5td” “DFStd_KEY” to Desktop. Open “SDD143.00_FULL”. Select setup language to continue. Click Yes to restart your computer. Click Next. Installing… Click Next for installing SDD. Select “I accept… agreement” and click Next. Tick on “I have read and understand…” and click Next. Destination: click Next. Languages: click Next. Click Install to begin installation. Installing SDD… Click Next to install M0XA UPort 1110/1130/1150 Windows Driver. Destination location: click Next. Start menu folder: click Next. Click Install to begin installation. Installing M0XA UPort 1110/1130/1150 Windows Driver. Click Finish for installation of M0XA UPort 1110/1130/1150 Windows Driver. Go on installing SDD… Click Finish when successfully installing SDD and restart your computer. Part 2 Install VDF_JA Open My Computer>>143-1(F:)>>VDF_JA_143. Choose setup language. Installing… Click Finish after successfully installing VDF_JA. Part 3 Install VDF_JV Close all the interface, and reopen My Computer>>143-2(F:)>>VDF_JV_143. Choose setup language. Installing… Click Finish after successfully installing VDF_JV. Part 4 Install Additional Pinpoint Tests Open My Computer>>143-2(F:)>>SPA_143. Prompt: Additional Pinpoint Tests will be installed as a background task. Click OK. Installing Additional Pinpoint Tests…. (wait for about 1 hour) Click Finish after installing Additional Pinpoint Tests. Part 5 Install SDD 143.01.001 Close all the interface, and reopen My Computer>>143-3(F:)>>SDD 143.01. Click Yes to restart your computer. Installing SDD 143.01… Click Finish after installing SDD 143.01.001, and restart your computer. Part 6 Install VDF_LA Close all the interface, and reopen My Computer>>143-3(F:)>>VDF_LA_143. Choose setup language. Installing… Click Finish after installing VDF_LA. Part 7 Install VDF_LV Open My Computer>>143-3(F:)>>VDF_LV_143. Choose setup language. Installing… Click Finish after installing VDF_LV. Part 8 Install J2534 MongoosePro JLR Setup Close all the interface, and open “Driver” on Desktop. Right click drivers for MongoosePro JLR for Install. Click Next. Click “I accept…agreement” to go on….
KTAG FW 7.020 Introduction: Model name:Ktag FW 7.020 Software Version:2.23 Update:By link Car Models:For trucks ,heavy duty,boat… Languages:Multi-language Functions:Ecu Programmer Connection:By OBD2. Computer requirements:XP/WIN7/WIN8/WIN10 how to install Ksuite 2.23 software for KTAG FW 7.020 with step by step! Better install it on Windows XP Note: Before install, please disconnect the internet connection. Below installation guide is only used for KTAG Firmware 7.020. P.S. Two kinds of KTAG 7.020 to choose: Same function, same token unlimited. Only Difference is appearance look KTAG V2.23 FW 7.020 Master with token renew button KTAG FW 7.020 ksuite V2.23 with token renew button KTAG FW 7.020 ksuite V2.23 with token renew button How to install KTAG Firmware 7.020 Ksuite 2.23 software on WIN XP? Unzip KTAG Ksuite 2.23 software then run Ksuite 2.23 setup.exe. You will see a “License Agreement”. Choose “I accept” and click “Next”, click “install”. During Ksuite 2.23 installing process, you will see “Microsoft Visual C++ 2005” agreement. Click “Yes” to accept all items and go on. After that, you can see KTAG Ksuite 2.23 software information: Improved checksum error for family 532 (FIAT MARELLI MM8GMK SPC564A80 CAN) Added new file type for family 535 (MAZDA DIESEL DENSO RENESAS…


